Many people experience problems with their front and rear sprockets being loose, which can result in wobbles and damage to the chain and sprocket itself due to the loose sprockets. There are several reasons why the rear sprocket bolts might loosen up, but one of the most common is the wear and tear of the Harley Davidson bike.
It is also important to consider the riding style and conditions when choosing sprockets and chains for your Harley Davidson. If you own a Harley Davidson bike that is used primarily for off-road purposes, you are more likely to encounter dirt, grime, bumps, and carrier loads than if you own any other street bike.
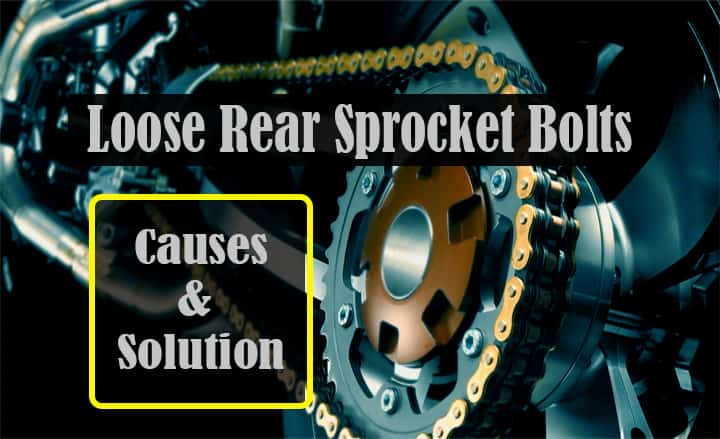
In order to ensure power is delivered to the ground efficiently and reliably, it is very important to maintain your machine’s final drive on a regular basis. There are primarily two types of final drive, chain, and sprockets, but there are also chains guides and chains rollers included in the final drive system. Here’s a look at how loose rear sprockets are caused by their bolt issue.
Why Loose rear Sprocket Bolts Occur?
Causes of Loose rear Sprocket Bolts
There is a common problem that bikers face, but fortunately, it is one that can be easily fixed. As a result, the extensive energy transfers through the sprocket. The nuts and the bolts on the sprocket come loose because they get caught as a result of the sprocket’s extensive energy transfer.
There are occasions when you will hit some straightaway while you are rolling the throttle and the sprockets will spin quickly, then slowly, then quickly again, and occasionally they will just open up and spin freely.
You have a recipe for loosening that which has to remain fastened when you combine all the jostling from the ground with the jumps and whoops. The tightest of tights on these little bolts eventually come undone.
Solution of Loose rear Sprocket Bolts
As a precautionary measure, you can make sure that your rear sprocket bolts are tightened every time that you ride your bike with your torque wrench, to ensure that you are not in any danger of being in a potentially dangerous situation in the future. It is most likely that you will be unable to move them even an inch, and that is the point. As a further step, you might want to consider use a bolt cutter to secure the bolts, so that if you forget to check the bolts before each ride, which is something you are sure to forget to do, the bolts will remain tight for a long time.
Causes of Loose Rear Sprocket
Getting a good sense of if the chain is wearing can be done by grasping the chain near the rear sprocket’s rearmost part and pulling it away from it as hard as you can.
There is no question that a brand new chain will not move at all, but there is a general rule with those that do, which states that if you can see half a tooth’s depth at all, it’s time to buy a new chain-set.
- A point that must be remembered is that drive chains do not stretch, they wear a bit at each roller. So as a result, the chain becomes longer and has a different pitch due to the wear, and hence there is a greater distance between links due to the wear.
- In fact, the chain sprockets do not wear like that, and should the chain become too long, the load applied to the sprocket is applied to just the last few teeth of the sprocket instead of the entire engagement of the sprocket. This is one of the reasons why chain sprockets get hooked teeth over time as their teeth become worn out.
- If the chain is relatively fresh, it will move very little or not at all when it is taken away from the sprocket since it still has the same pitch as the sprocket is engaged.
- As the chain ages, the additional clearances in its rollers and bushings cause the chain pitch to slightly increase, which causes the chain to pull considerably farther away from the sprocket. It’s time to look for a new chain-set if this technique reveals a discrepancy of about half a tooth.
Solution of Loose Rear Sprockets
- To reduce the impact inside the hub during abrupt torque and breaking, replace the cush drive rubber bushing with new ones.
- Check your wheel bearings if you notice that the rear wheel is wobbling or moving dramatically since they may be worn out or damaged.
- Remove the rear wheel seals and disassemble your bike’s or motorcycle’s rear wheel. After that, remove the spacer and the worn out or broken wheel bearing and swap them out for new ones. The rear wheel and sprocket wobbling, which might have developed as a result of damaged ball bearings, will be eliminated as a result.
How to Tight Rear sprocket? Methods
- When using a swing arm for a motorcycle or bike, the rear wheel and sprocket must be placed parallel to the swing arm or between the swing arm and the rear wheel.
- It is necessary for you to remove the motorcycle’s back wheel with the help of a ring spanner.
- The bolts securing the rear sprocket must now be tightened in order to prevent the sprocket from moving.
- It is important to reinstall the rear wheel on the motorcycle.
- In order to place the axle back into position, you must be careful when doing so. It went straight into the slot and through the wheel, just as it should have done.
- As you did before, position the wheel between the swing arms in the same manner.
- In the process of attaching the chain to the sprockets, align the wheel after it has been attached.
- The bike is now ready to be ridden once the rear nut is screwed in place with a ring, and everything is ready to be used for the Harley Davidson bikes.